Embedded Files

Directions:
Included Parts:
Wall Mount Arm
Screw Cover (optional symbol cover)
Ball Joint/Custom Ball Joint
Optional: Wall Screws and Anchors
Step 1: Mount the Arm to the Wall
Step 1: Mount the Arm to the Wall
Position the wall mount arm at the desired location on the wall.
If desired, use the included screws and anchors for secure attachment. (Anchors are recommended for drywall or other less stable surfaces.)
Ensure the arm is level and securely fastened to the wall.
Step 2: Attach the Screw Cover
Step 2: Attach the Screw Cover
Slide the optional screw cover over the mounted arm to conceal the screws for a polished look.
Adjust as needed to align the cover with the arm.
Remove the following piece from the set:

Step 3: Install the Ball Joint
Step 3: Install the Ball Joint
Position the ball joint at the end of the arm.
Secure the ball joint, allowing it to rotate and tilt for dynamic display.
Adjust the ball joint to the preferred angle to showcase your set and tighten.
Incert the stem into the hole on the underside of the set. Make sure the 1x2 is on the same side as the piece removed eariler.
Your mount is now installed and ready for display!
What makes the Heavy Duty Mount, "Heavy Duty"?
What makes the Heavy Duty Mount, "Heavy Duty"?
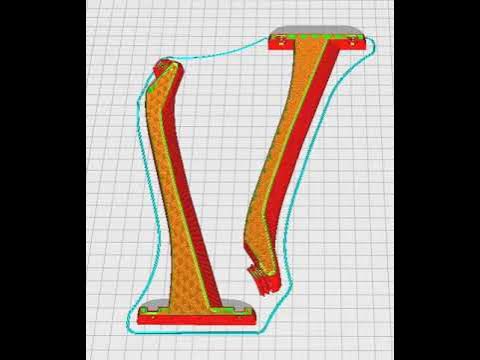
The Heavy Duty Mount (HD) is printed in two halves laying down, then glued together in post processing. The standard Universal Wall Mounts (UWM) are printed standing up, pointing up.
Heavy Duty Mount
Heavy Duty Mount
Printing in two halves like this spread's the 3d printed layers across the length of the whole arm making it much stronger and able to support more weight. This process requires a larger print area and reduces the number of mounts that can be printed simultaneously.
Universal Wall Mount
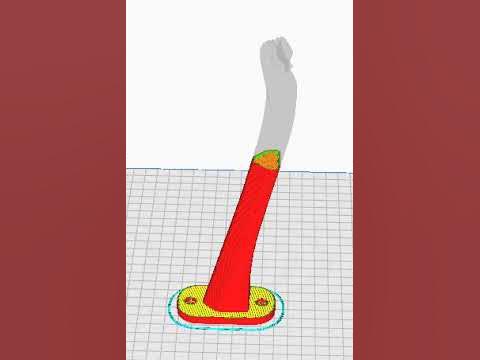
Universal Wall Mount
Printing standing up offers standard rigidity and can support smaller/lighter sets. More UWM's can be printed at once and are not required to be glued together in post processing. Click the video below to see how its made!
Have a question? Have a problem? Please reach out!
[support@bp3dprintshop.com] [ 509 - 866 - 6195 ]
These installation instructions are compatible with the sets listed below, as well as many others.
These installation instructions are compatible with the sets listed below, as well as many others.
Page updated
Report abuse